Textures design standards
In the years 2000 to 2010, textures for 3D models were designed from 3D models that were projected onto plans, these plans becoming texture maps (maping) that were then worked from 2D software such as PhotoShop, Corel Draw or The Gimp.
In the last three or four years, a new way of designing textures for 3D models has emerged. With this new design, PBR textures "have been used more and more in simulators and games...".
It is now the 3D objects themselves that are worked on using specific software where one paints directly on the model, freeing oneself from the constraints that were inherent in the old processes, for example the junctions between parts that were difficult to achieve.
In the category of these new softwares, Quixel (Adobe PhotoShop plugin) and Substance Painter (SB) were the precursors.
Quixel, which required a lot of resources (it ran within a PhotoShop edition and it was enough that the image to be processed was a little large for the software to crash irremediably).
On the other hand Substance Painter created by Allegorithmic (a French company) was a dedicated software which imposed itself by its new approach and its graphic performances.
One or two years ago, Allegorithmic was bought by Adobe and the software became unaffordable (nearly 200 €) for the occasional use that one can make of it in our creative field. But it has become a reference in the graphic field: games, graphic design, etc.
Quixel has also transformed itself and has become Quixel mixer. It is free and it is no longer a plugin of PhotoShop but a dedicated application.
I had bought an SB licence in 2018 during a promotion on Steam and immediately the software showed its great capacities but in return it still requires a very large investment to get the quintessence from it.
Philosophy of this new software: As simple as the old graphic process was, we took the 3D model and projected it on a plan or we drew seams on the object and then we developed the garment of this object on a plan. The result was called a mapping or texture map which served as a model for livery enthusiasts.
This mapping was covered by several layers: dirt, rivets, shadows, etc. and in the end it was the texture that would dress the object.
The models of light restitution were based on diffuse reflection, specular and normal.
The big difficulty was to find the right stitching so that the final design could be made without deformation and could be conceived on all the objects making up the model. The joining of a line on several objects was a difficult challenge to solve. This problem was a constraint in what could be achieved and could in some cases prevent the realisation of a livery.
The new design is based on the fact that from now on, after carrying out conventional mapping, the model or part of the model is exported in 3D into a software program that will allow painting directly on the 3D model.
This new conception deeply modifies the way of modelling and forces to think a little differently.
Graphic workflow : The graphic process is therefore as follows:
- we design the 3D model
- we create the usual mappings according to the various materials that will be applied to the model
- export the 3D model in OBJ (Wavefront) or FBX (Autodesk export model) format
- import this OBJ or FBX model into the graphics software
- various materials are created
- these materials are applied to the various parts of the object
- we export the resulting textures from these manipulations
- we go back to the 3D software and use the previous textures to dress the model
- the final result is exported in the appropriate format.
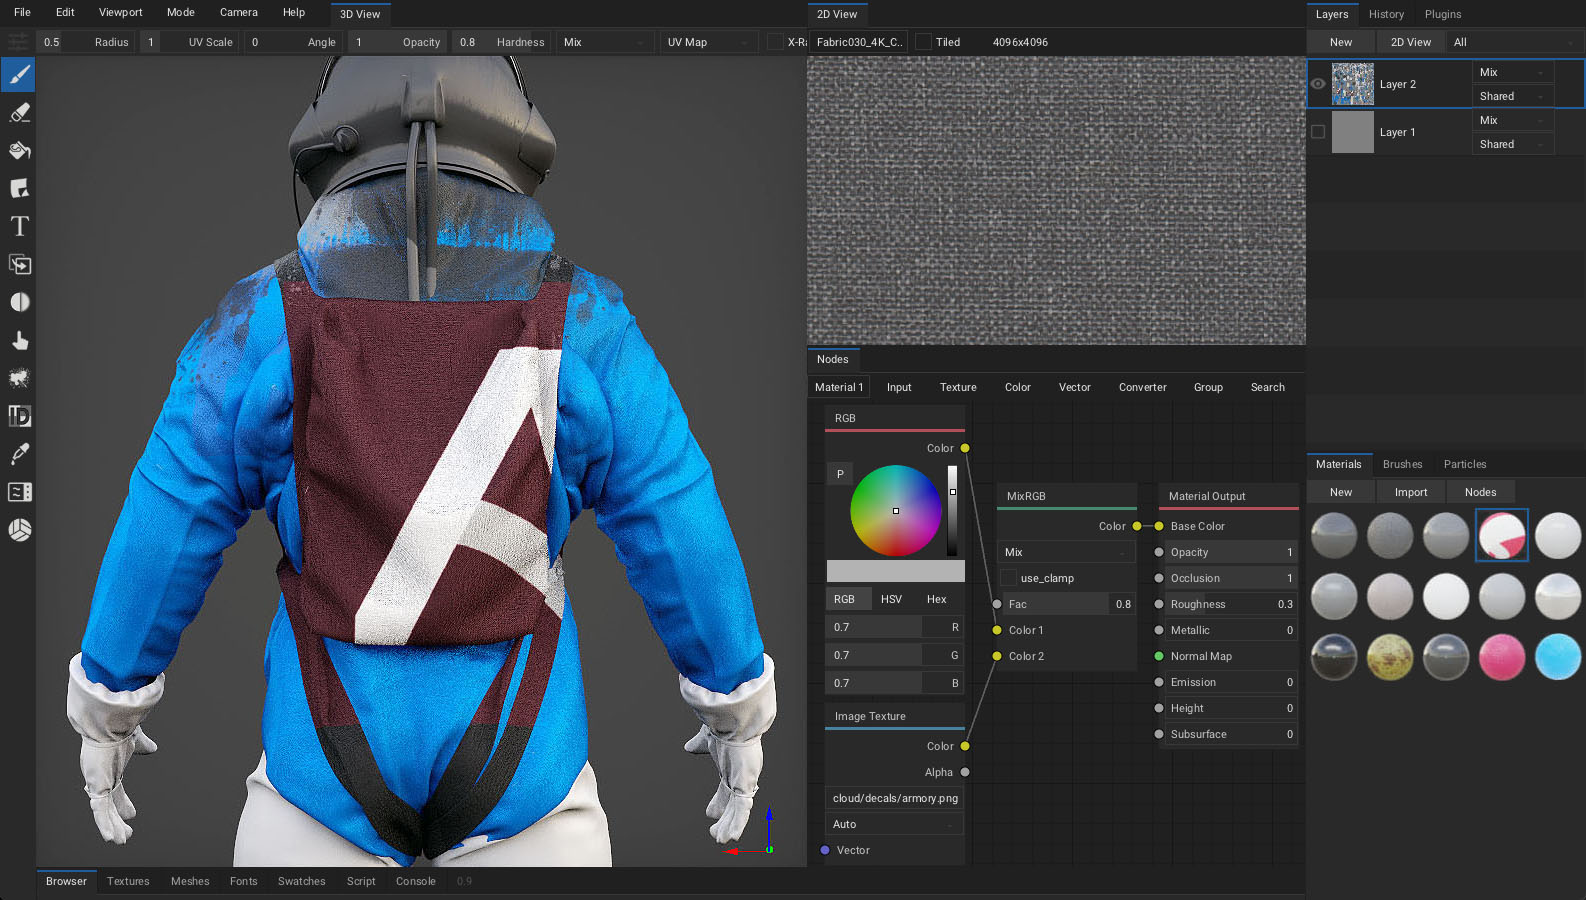
New software: Armor Paint
Project page: https://armory3d.org
Latest developments: https://github.com/armory3d/armorpaint
Documentation: https://armorpaint.org/manual
How to buy: https://gumroad.com/l/armorpaint
The sober interface, a minimalist approach but sufficient for the needs:
A second version exists ArmorPaintDXR (supplied with ArmorPaint) which allows even more things but which I didn't have time to dissect :
The Armory3D project gave birth to two products, Armory 3D Engine and ArmorPaint. The latter is of course based on the former. This engine proposes a complete integration in Blender, which at the moment is a real plus.
It has been developed since 2017.
Characteristics of ArmorPaint
- it is a software in its own right and not a plugin
- it is based on the use of nodes (like 3DS Max and Blender)
- it can be accelerated by the GPU
- it allows to create PBR textures
- it allows ray tracing
- it is in full development (I use version 0.7 or 0.8 dev)
- it allows you to make bake textures
- it runs on Windows, Linux, Apple or Android
- it is very affordable, you can have it for less than 18€ as a contribution to future developments.
A large number of videos are available on the armorpaint.org website.
As for the first steps and discovery, I propose you the youtube channel of Alexander Kiryanov (Russian author but whose English is ... very understandable) with this video in particular:


 Textures design standards
 Reviews


 Top
Top


